Be the first to know — Get Outpost's monthly newsletter for news, tips and job opportunities.
Ideas
12 Pro Tips and Tricks for Compositors
1 October 2021
Our resident comp experts reveal the Nuke tips and tricks they can’t live without
Naturally, as artists become more familiar with Nuke, they pick up shortcuts and develop ways of working which enable a faster, more efficient workflow.
But it can take a long time to get there; learning by doing is often a lengthy process. With many talented and experienced compositors in our global studios, we figured we must be sitting on a goldmine of Nuke tips that could potentially help even seasoned compositors save some time and sidestep some issues.
So, we’ve picked the brains of a handful of our compositors for little nuggets of Nuke gold, and we weren’t disappointed…
Huge thanks to Outpost VFX Compositors Linda Kim, Daniel Pereira, Shaunik Kalia, Niamh Scott, Senior VFX Compositors Julien Record, Renaud Quilichini and James Naud, 2D Supervisor Luddnel Magne, and Head of 2D Bjoern Gottwald for sharing their Nuke wisdom.
Find more nuggets of Nuke gold over in our Part Two of Tips and Tricks for Compositors here.
1. Optimising and removing unwanted passes in scripts
Always remove unwanted / unused render passes running through the CG pipe as Nuke will calculate all existing passes in the script even if they are not explicitly being used. The Remove/Keep node will do the trick.
The Scanline Render node also generates additional passes by default. Make sure you remove them or turn them off from within the node setting.
2. Learn your hotkeys
Always learn hotkeys. Even though it seems like a small thing, they really make you more efficient. Go beyond having the basic nodes down – learn the shortcuts for fiddly tasks too, like switching inputs (Shift+X) or swapping out nodes (hold Ctrl + Shift + drag and drop the node you want over the one you don’t, or Ctrl+Shift+X to take it out of the stream completely). These will make your life easier and your work quicker.
3. Save your script as a toolset
When you've figured out a way of doing something that you know will be used again or is just generally useful, save that little bit of your script as a toolset and you'll be able to access it again and again when you've long forgotten the original comp you did it in.
4. Extending bounding boxes
Always keep a look-out for bounding boxes generated in Nuke scripts. Nodes and Gizmos like Blur, Exponential Blurs / Glows, Transforms and Masks may increase the bounding boxes beyond your shot canvas.
This can get out of hand very easily as Nuke starts calculating pixels in these extended regions, increasing Nuke feedback time and even render times. The CornerPin node is a good example as it can easily skew the bounding box to extreme values causing calculation errors.
It’s best to keep this in check and use Crop nodes to keep the pixel calculation limited to only what would be required within a shot.
5. Fix extraction edges
When working on an extraction, a great way to fix the edges (bright or dark) is to do an edges extend on the image unpremult, but merged in min (bright) or max (dark). Just be sure to set the merges to RGB to avoid having unwanted alpha.
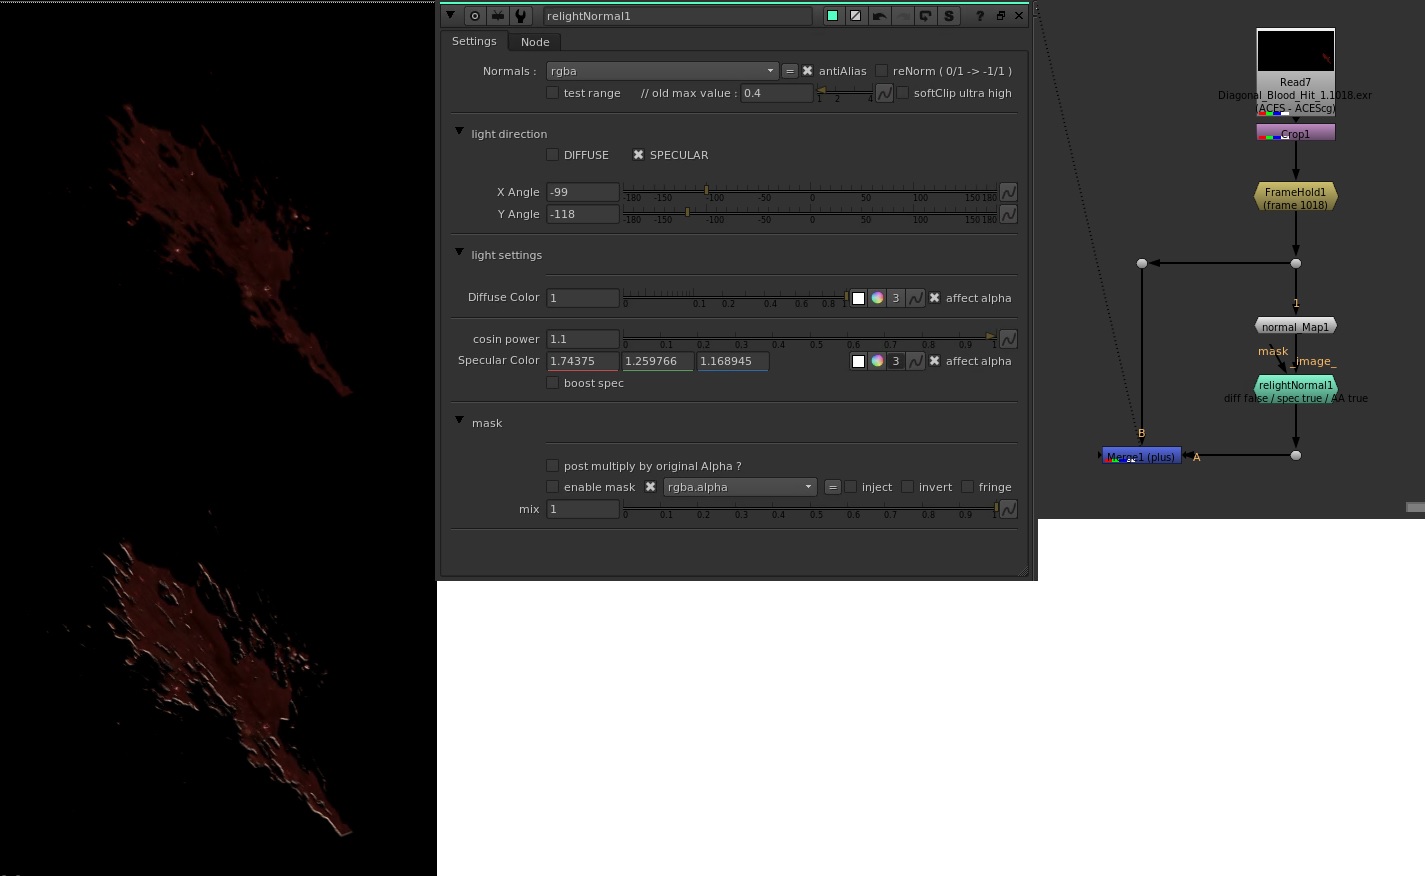
6. Relight 2D elements quicker with ‘relight’ gizmo
If you’re looking to give 2D elements more depth or add specs, using a gizmo called Relight will make your job ten times easier.
All you have to do is plug in the normal node – this will create the normal of the element, which can be done based on the alpha or the luminance of the element (whichever better suits your goal) and plug in the relight gizmo node.
From there you can choose the angle of the light you want as well as the colour and strength. Add the result on top of your element and you’re good to go! It’s a really simple gizmo which saves a lot of time when needing to integrate those 2D elements on the plate.
7. Customised shortcuts
Hotbox by Wouter Gilsing is an awesome user interface that includes smart customised shortcuts to quick change some custom values for any nodes without taking too much time to open the properties panel, or loading some daily setups we do manually, for example projection setup. This gizmo considerably speeds up the workflow once you take the time to customise it with your own preferences.
8. $GUI Expression
You can optimise your script and save time by preventing certain nodes (typically defocus, motion blur etc.) from contributing to the result, or have them work with certain values to speed up your work. These nodes will still fully execute when the script is sent to a render farm.
You can use this in two ways:
a. Disable the node in the Viewer by selecting the node and pressing Ctrl+D this will set a simple $GIU expression in the disable knob of the node.
b. Specify values to use while in the Viewer. To do this, right-click on the knob and choose ‘add expression’, then type the expression following this format: $GUI ? [value to use when in Nuke] : [value to use when on the farm]
For example, if you want a Scanline Render node to compute motion blur, but you do not want to compute it while working, in the ‘samples’ knob you would type this expression: $GUI ? 1 : 15. This translates as ‘if this node executes in Graphical User Interface, use 1, or else use 15’. This means Nuke will use 1 sample while in the Viewer, and 15 on the farm, speeding up your workflow.
Make sure to leave an explanatory note for the potential artist picking up your script, so they aren’t surprised when comparing the render and the output of the comp.
9. IBK Stacking Technique
A powerful way of using the IBK to pull a key, is to stack the IBKColor node, to create the most accurate clean plate before inputing the result into the IBKGizmo ‘c’ pipe.
To do this, first set up your IBKColour node: set the colour of the screen and the size to 1 (to preserve detail to pixel scale), then play with the ‘darks’ and ‘lights’ until you get rid of as much subject as possible, leaving a dark silhouette against the blue/green screen, then ‘erode’ slightly, to remove the last details like hair or motion blur, and ‘patch black’ at 2.
Here is an optional stage: if you still have a little subject detail, you can stencil them with a roto where you clamp and crunch the values, leaving only black and white values, nothing in the grey scale (essentially aliasing your mask).
Duplicate the first IBKColor node, chaining the 2nd into the 1st, and expression-link (Ctrl+drag) the values of ‘darks’ and ‘lights’ from the first one to the second one, set ‘erode’ back to 0, and set ‘patch black’ to 4.
Duplicate that secondnode and set ‘patch black’ to 8.
Repeat and multiply the ‘patch black’ value by 2 each time, until the black silhouette is filled.
Make sure to obtain a clean plate keeping the details of the blue/green screen so that the alpha will not retain them, only the subject.
10. Use the dasgrain node
A great, timesaving node is called ‘dasgrain’. It’s a Nukepedia gizmo, but it’s a lifesaver! This tool is able to replicate what you have denoised from the original plate. If there is any paint or CG work added, then using the ‘scatter’ option with a mask around the newly made areas helps mimic the grain that in the original plate, by sourcing an area in the shot.
Regraining a shot is usually so minor but very important. It's something that can be overlooked when in a rush. Always make sure to check that your shots have been regrained; it’s one of the easiest things to check but also the easiest to miss.
11. Keep it clean and quick…
Take your time to optimize your script from the beginning. It'll be much easier for you to do quick changes later.
12. Never stop experimenting
Even if you think you have the perfect recipe for a specific task there will be one day a shot where it doesn't work, so it's good to have a wide repertoire of techniques to deal with these situations.


